| Thu
28 Aug 2008
More about the office.
Because our chairs rotate but are difficult to
slide along the floor I've got a slide out, slide sideway, rotate,
slide out even more desk.
Confused?
One problem I had in the previous motorhome was
that of using the laptop while also trying to refer to a book, say
when captioning photos where I need to read my "What bird is
that?" or whatever at the same time as entering the information
into my image-management program.
I used to put the book on the floor or try to
balance it on the arm of my chair. Neither option was satisfactory,
this time I want a desk with a wrap-around part to hold reference
material.
As mentioned I can't really move my chair so the
desk has to move instead, and while I'm on a roll the side part
should swing away to allow me to get out for a cuppa without packing
the whole thing away, and an armrest would be nice so I don't get
RSI from using the mouse.
That shouldn't be too difficult.
So that's basically what I've built, here are
the desk deployment steps,
- Slide the whole shebang out.
- Slide the book rest to the left.
- Rotate the book rest.
- Insert an optional piece to enlarge the book
rest area.
- Slide the arm rest out.
- Optionally slide the laptop out even further
on a second runner.
There, that was simple eh? Maybe the following
graphic will help.
Then again maybe it won't. I'll try to take some
photos soon.
Thu 28 Aug
We move the truck into
the light today to clean up in the wash bay.
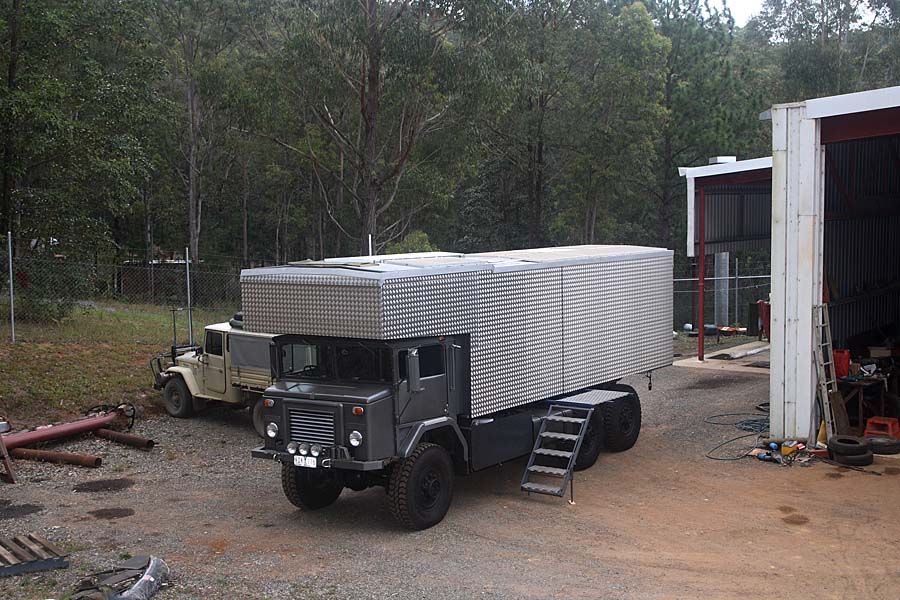

Two views of the truck during its
brief sojourn into the great outdoors.
From the outside it's looking
like the finished thing, but we still have a lot of internal work
to do. For example, here's a shot of the kitchen bench.

Our mocked-up kitchen bench, a piece
of ply to hold the sink in place and a pine plank for everything
else.
We been living with this lot for several months
now but it's one of the next jobs on my list.
Meanwhile let's talk about LED lights.
We’ve had no luck with LED lights at all,
of the four triple lights we’ve bought for the lounge room
the first went dim, the second started flashing some of the LEDs,
the third is now going dim, and the forth we’ve just plugged
in so who know what it’s going to do. I’ve got another
LED light on the laptop and one of it’s LEDs just failed.
I’ve got a $50 LED torch and we’ve replaced it twice
because the LED started flashing, now this one is playing up as
well.
Now that I think about it I’ve seen other
people with those halogen replacement LED bulbs with 10-15 LEDs
with some of the individual LEDs not working.
We spoke to a salesman at a local lighting shop
the other day and he stated that the cheaper lights are not very
reliable, but even the expensive ones in the shop had a three-year
warrantee on everything except the actual LEDs.
All in all I’ve had a gut full of LED lights.
Sun 28 Sep
The kitchen is finished,
and what a project that was. The bench top is made from clear pine
like most of the interior trim. The splash back area consists of
many doors and panels, these are made from ply with aluminium sheet
wrapped around the edges.

The finished kitchen bench.

There's a fold-out section at the
end that protrudes into the entrance/shower/toilet area. This gives
us a little extra space, primarily for use when washing dishes.

I've used the sink cutout to make a cutting board. When used in the sink (as shown) Chris can just
sweep the scraps into the sink through the hole.

Above the sink is a cupboard that
also holds a soap dispenser, water pressure gauge, and water meter.

Detail of the cupboard, closed...

...and open. This holds tooth brushes
and things needed as we head out the door, like torches and keys.

Detail of the dials and soap dispenser.
Note that because this is located above the sink it can squirt directly
into the dishwashing water.

The back of this panel showing the
plumbing for the dials.
Mon 29 Sep
Peter is on a job today mucking out a dam. At
around 2 we get a call, the bank gave way under the digger and it's
almost fallen into the dam.

Peter surveys the situation.
He managed to save it by driving the bucket into
the dam floor to prop up the machine, but there's no way to walk
it back out because as soon as the boom is lifted the excavator
will fall.
So we have to belay it with some kind of anchor
and Slineaway seems the obvious choice.
We pull up in the field and engage FWD, Slineaway
has an air-controlled transfer case so engaging low range and FWD
is simply a matter of flicking a couple of switches.
No sooner have I commented on how easy it is and
how I'd love that in my truck when smoke starts pouring from under
the dashboard.
I don't think that's supposed to happen.
Not two seconds later we hear a small "poof"
followed by the sound of escaping air.
Peter turns off the FWD switches and we investigate
to find molten insulation in a wiring loom and a nearby nylon air
line has blown.
Apart from that though there's no immediate danger
and the digger still has to be recovered so we continue.

Slineaway in place, ready to be used
as an anchor.
I run the rear winch line about 100m to the nearest
tree (actually it's the only tree) then we both run the front line
to the digger.

We run a cable from Slineaway to
a snatch block on the digger then back to the motorhome.
We wind in both winches to take up the slack,
then I get in Slineaway and Peter gets in the digger. With the machine
anchored he should be able to lift the boom and walk backwards while
I keep tension on the line by reeling in the winch.
It works a treat and within a minute or so the
digger is free, so now we turn our attention to the motorhome.
Peter tries to reverse out of the field but it's
obvious there is no drive on the front axle.

Now Slineaway is bogged as well.
Fortunately the farmer who owns the land is here
with his tractor. With the truck's rear drive and some help from
the tractor Slineaway is extracted from the mire.

Slineaway being scull dragged from
the mud.
Now we can have a look at the drive problem. Not
having FWD doesn't matter for the moment as the truck is on firm
ground and only has to be driven home on the bitumen, but we find
that it's also stuck in low range.
We remove the air control lines from the transfer
case and experiment with blowing air into the ports using a line
connected to the compressor.
Eventually we get the right combination and Slineaway
is a goer.
Well that was fun.
Wed 1 Oct
Here's some more photos
of the kitchen area, specifically the mangle storage.

The mangle in its cubby hole.

Closer view of the mangle. Note the
circular object in the bench, it's a milkshake container we use to put cultery in while dishwashing.
The mangle swings out over the sink when in use
and stores behind the splash back the rest of the time.
This mangle was a real find. About ten years ago
when building Wothahellizat 1 we decided we wanted one so I went
on the hunt, only to be told by various antique dealers that they
were as rare as hen's teeth and that there was no way I would find
one.
I was thinking that I may have to settle for a
washing machine with an inbuilt mangle then cut it up and modify
the mangle so it could be mounted inside the truck.
Then one day while at the markets where I used
to sell my photos I spotted one across the hall and made a bee-line
for it.
It was perfect, made in the 50s but still in the
original packaging right down to the greaseproof paper wrapping.
And even better it was one of the type that were designed to clamp
onto those old dual concrete sinks so it had the mounting hardware
in place.
The fellow only wanted $60 and I bought it on
the spot. We've been using it ever since with the only issue being
a flat spot in the rollers because of the prolonged storage without
them being rotated.
Meanwhile back at the woodwork.

Just a couple of the assemblies I've
had to create.
|